Monday, May 21, 2012

Iced Coffee

This past year I've been on a major diet and have lost 90 pounds..... I will wait for your applause... Everyone asks me what my secret is and I am about to finally share it....iced coffee! I've been drinking this during the day and it keeps my tummy full and since I'm using fat free creamer it is a delicious nonfat treat!


For Christmas my husband bought me one of these, and it changed my life! I started making iced coffee right away, but my problem was I was going through those little k-cups so quickly! I decided to make a large batch of coffee to store in the fridge and so far it's worked out great! I made a 1/2 gallon for the pictures, but this recipe makes a gallon.

Ingredients
1 bag ground coffee, any flavor, any brand
Cheesecloth
Coffee filters
1 gallon water
Creamer, any flavor...but remember fat free is awesome!!

Directions
In a gallon sized container filled with water add one bag coffee. Stir, cover and refrigerate for 24 hours.

The next day, remove coffee from fridge and set up a straining system. I used a strainer lined with cheesecloth and placed this on top of another pitcher. Slowly pour the coffee through the cheesecloth into the new pitcher; this takes a little bit of time and patience.


Once coffee is strained you are ready to make your iced coffee. Grab a glass and fill it with ice, next pour desired amount of coffee into the glass, top with creamer, stir and indulge! I like a lot of creamer in mine!! This coffee base can be stored covered in the refrigerator for up to a month.

Ingredients
Pour coffee grounds into pitcher of water
Stir and refrigerate, loving the S
Make sure to cover pitcher
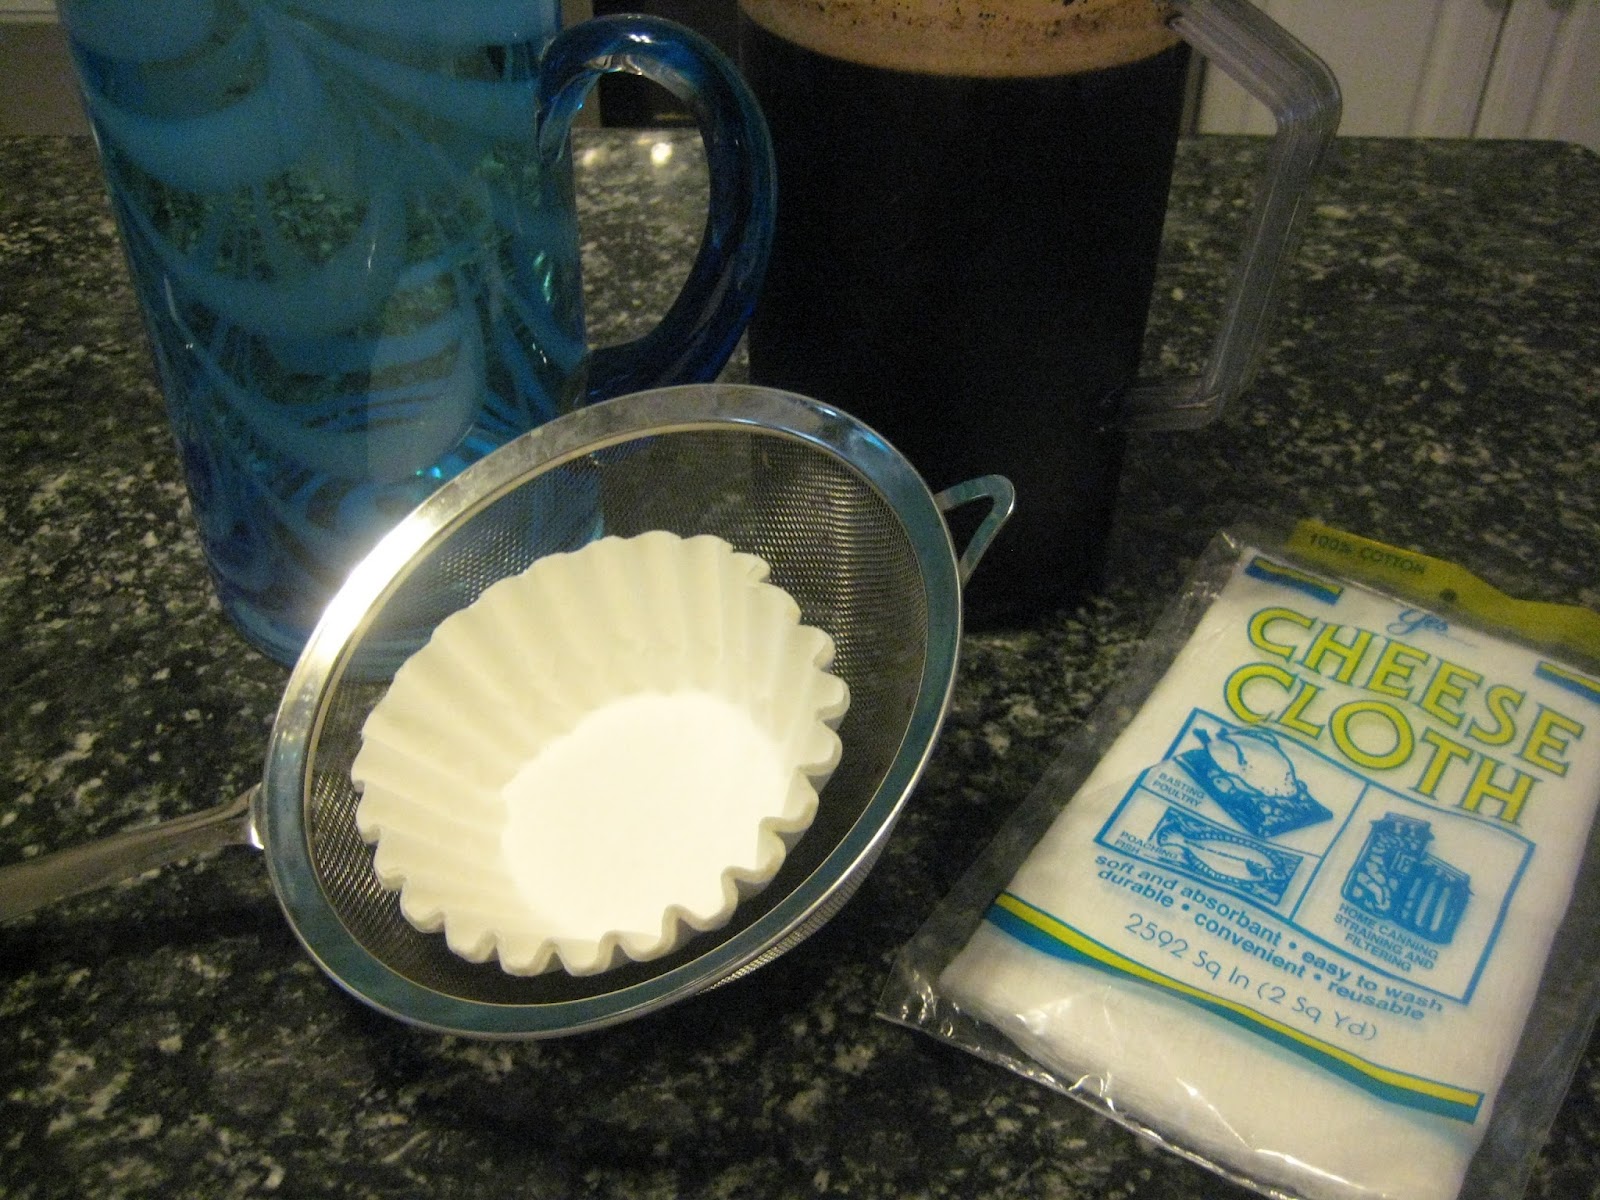
The next day you will strain the coffee grounds
I used cheesecloth, super cheap and can be found at the grocery store

 Pour coffee through cheesecloth
The grounds all end up in the cheesecloth and not the pitcher
Ingredients for the good part
Pour creamer over ice and coffee, stir


Enjoy!!


Sunday, May 6, 2012

Lemon Bars

Lemon bars are a perfect food to bring to a party; they are easy to make and everyone loves them. For some reason they remind me of my childhood, lemon bars were one of the first things that I learned to bake on my own. We made everything from scratch in my home and usually had all of the ingredients on hand...of course we used lemon juice from a glass bottle and I had no clue what zest was...


Ingredients
2 1/4 cups flour, DIVIDED
1/2 c powdered sugar
1 c cold butter, cut into pieces
4 large eggs
2 c granulated sugar
1 tsp lemon zest
1/3 c fresh lemon juice
1/2 tsp baking powder
Powdered Sugar


Preheat oven to 350. Line bottom and sides of 9x13 pan with either parchment paper or aluminum foil, allowing 2-3 inches to extend over sides; lightly grease foil.


Stir together 2 cups flour and 1/2 c powdered sugar. Cut in butter using pastry blender, fork or fingers..until crumbly. Press mixture into bottom of prepared pan.


Bake at 350 for 20-25 minutes or until lightly browned.


Meanwhile, whist eggs in a large bowl until smooth; whisk in granulated sugar, lemon zest and lemon juice. Stir together baking powder and remaining 1/4 c flour; whisk into egg mixture. Pour mixture over hot baked crust.


Bake at 350 for 23 minutes or until filling is set. Let cool in pan on a wire rack for 30 minutes. Lift from pan, using foil or parchment paper as handles. Cool completely on a wire rack, 30 min. Remove foil and cut into bars, sprinkle with powdered sugar.


These freeze well for up to a month. 


Ingredients 
Line 9x13 with either parchment paper of foil
Making the crust
The crust is ready
Place it in pan and bake
Mixing the filing all together
Crust out of the oven
Pour filling over top of hot crust and bake
yummmm


Enjoy!


Friday, May 4, 2012

Chocolate and Peanut Butter Pretzel Bites

When I first came across this recipe, I knew it was a winner..chocolate, peanut butter and salty pretzels....yumm!! It was super easy to make and they taste delicious! I am a little worried about them holding up in the heat tomorrow (we live in Florida) so I am going to transport them in a cooler...yes I know I am a genius!

We are going to my husband's family reunion tomorrow and I am in charge of desserts. There are going to be quite a few people there and so I wanted to make a few different things, since everyone has different tastes. I made Cinco de Mayo Cheesecake and Lemon Bars (recipe coming soon).


Ingredients
1 cup creamy peanut butter
2 tbsp softened butter
1/2 cup powdered sugar (maybe more)
3/4 cup brown sugar (maybe more)
Pretzels
1 1/2 bags  semi-sweet chocolate chips
Directions
Combine peanut butter and softened butter in a large bowl with a fork or whisk, or in a stand mixer.  Add the sugars and mix to combine.  At this point if the filling will roll easily into balls without sticking to your hands you’re ready to go.  If not, add a little more of each sugar until you reach a consistency that is easy to roll (I used about 3/4 cup of each sugar).
Use a teaspoon measure to scoop the filling.  Roll each portion into a small ball, then sandwich them between two whole pretzels.  When all the balls are rolled and successfully sandwiched, stick the whole tray in the freezer for about half an hour.
Pour the chocolate chips into a microwave safe bowl and heat at 30-second intervals, stirring occasionally until completely melted.  Remove the pretzel sandwiches from the freezer and quickly dip each half-way into the melted chocolate.  Return to the tray and repeat with remaining sandwiches.  When all are dipped, return the tray to the freezer to set up completely.  Store the sandwiches in the refrigerator until serving time.

Ingredients
The consistency you want for the filling
Take a small amount of peanut butter mixture and roll into a ball and place
on top of pretzel
place a second one on top, and squish
So cute!
Dip  in melted chocolate
Place on parchment paper to dry
assembly line!!


Wednesday, May 2, 2012

Steak Pizza

I will admit I love pizza and could eat it every single night! This is my new obsession and I can't even begin to tell you how delicious it is! The best part is that it's super simple to make and it will wow your taste buds! I love how it uses store bought ingredients that you probably already have in your pantry and fridge, what could be easier!


Ingredients
1 skirt steak or flank steak 1 1/-2 lbs
Salt and pepper to taste
1 red onion, thinly sliced
1 TBSP olive oil
4 TBSP balsamic vinegar
2 cups marinara sauce (I used Ragu)
1 ball of pizza dough, or store bought
2 cups mozzarella cheese
Steak Sauce
Shaved parmesan cheese

 Season the steak with salt and pepper. I used my panini maker to sear my steak, but you can use a grill or even a frying pan. The key is to not over cook the meat, cook roughly 2 minutes per side and then place on a cutting board for later.

In a large skillet placed sliced onions in 1 TBSP olive oil and 2 TBSP balsamic vinegar. Let cook for about 10 minutes or until soft.

Mix the marinara sauce with the remaining 2 TBSP balsamic vinegar, this gives it a rich flavor.

 Preheat oven to 350. Roll pizza dough out on either cookie sheet or pizza stone/pan. Spread the marinara sauce over the top of the crust, next place cooked onions on top of sauce. Spread the mozzarella cheese on top of onions and bake for 12-15 minutes or until crust is golden brown and cheese is bubbling.

Remove pizza from oven and slice steak into thin strips and place on top of cooked pizza. Next pour steak sauce over the top of the steak, the amount is up to you. Sprinkle liberally with shaved parmesan cheese and place pizza back into over for 3-4 minutes. Slice and serve. Serves 4


Enjoy!


 Source; Adapted from The Pioneer Woman Cooks